The heat of summer can burn bare patches into even the best-kept lawns. But the good news is that early fall – which is now only a month away – is prime sodding season.
Sod is essentially a mature grass cover that has been professionally cultivated and cut into easy-to-lay-down squares. What makes it so popular is that it allows you to see the results of grass landscaping much more quickly than if you planted seeds.
The first thing to determine is how you will use your sod. It is just as effective for “patch jobs” as it is for redoing entire grassy areas. Once you’ve done that, then you can begin the actual work of laying it down.
Step 1: Turn over the soil
Do this to a depth of 4 or so inches. If you are only working a small area, use a pitchfork. Otherwise– and especially those covered in hard soil – us a rototiller for large areas.
Step 2: Prepare the planting area
Rake the soil using a garden a garden rake to create an even surface. Wet the soil thoroughly with a soaker hose or sprinkler 2 to 3 days before planting the sod, which needs dampness to get established.
Step 3: Begin sodding at a landmark
This is important so that you will have as straight a pattern to work with as possible. For example, if the sod will abut a driveway, sidewalk or path, begin sodding against these pre-established landmarks.
Step 4: Treat sod squares like bricks
Lay squares of sod side-by-side. Build the first row and then move on to the next. Use a carpet knife to cut pieces of side to different lengths and don’t forget to stagger the joints as though you were laying down bricks.
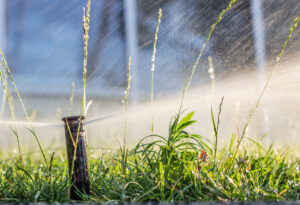
Step 5: Water newly sodded areas
Use a soaker hose to wet newly laid sod to a depth of four inches. After that, be sure to water daily for the first two weeks. Sod takes approximately 3 to 4 weeks to get established. Because Austin is still under stage 2 water restrictions, you will need to water it once or twice a week.